In this tutorial you will learn how to build a Silverbird Accra API on Glitch with Node.JS and Express.js.
Glitch is basically SoundCloud for simple* apps or bots. You can roll out a real web application easily and for free. No complex setup process, just create a new project or remix an existing one, write your code and you’re good to go.
I use Glitch a lot. It’s my go-to for experimenting on the numerous fun ideas I think up. I’ve made a twitter bot and a back-end for a polling app & shark all with Glitch. I honestly cannot recommend Glitch enough.
Creating a Glitch project
- Go to glitch.com and sign up for an account.
- If all goes well, you should see a “New Project” button at the top right of the webpage. Clicking on it brings up three (3) options. “hello-express”, “hello-sqlite”, and “hello-webpage”. Since we’re building an Express.js application, pick the “hello-express” option.
- Your glitch project should now be created with a random project name like “famous-carpet”. You can change your project name and description by clicking on the button at the top left of the webpage. I changed mine to “silverbird-scraper”.
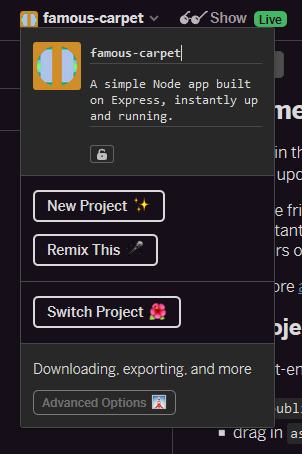
At this point, your glitch app should be running. To view your app click on the “Show” button.
NB: If there are no errors in your project, your “Show” button would have a green “Live” badge next to it. Otherwise it’d be a grey “Off” badge.
Project cleanup
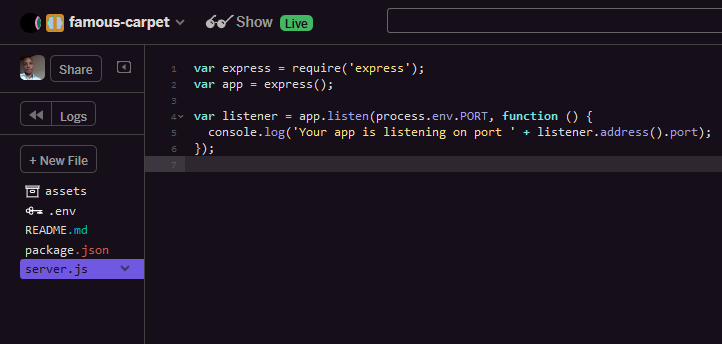
On the left side of the Glitch project webpage you should see a few folders and files Glitch created for you. Some of the files are only necessary based on the kind of application you’re building.
Folders and files
- The public folder houses your CSS and JS files.
- The views folder houses your HTML files.
- assets houses your images, fonts etc. Assets is a free CDN.
- .env is where you keep sensitive credentials like API keys etc.
- server.js is the entry point of your node-express application.
- package.json is where you can add or remove node packages. Glitch makes it easy for you to add or remove packages. To add a package click on your package.json file. At the top left click on the “Add package” button, search for your package and click “Add”. Glitch will then download and add the entry to your dependencies. To remove a package simply remove the entry from your dependencies in your package.json file.
Cleanup
Since we’re only building an API we can get rid of the public and views folder. In server.js, we can also get rid of the code that sets up Express static files. At the end of clean up, your project should look something like this ( 👇👇).
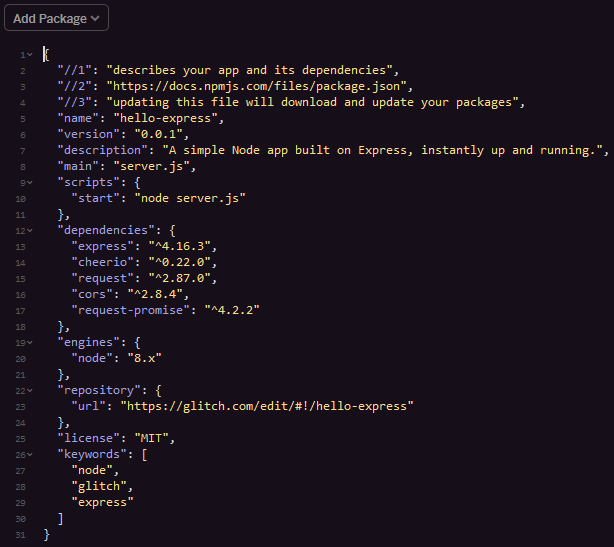
Dependencies
For our API there are a few dependencies we’d need to add to our project.
- Request: For downloading the HTML of the Silverbird Accra website.
- Request-Promise: For adding Promise support to Request.
- Cheerio: For parsing the HTML we download and retrieving the bits we want.
- CORS: In a follow-up article, we’ll be building an accompanying front-end for this API with Vue.js and we’d need CORS to enable Cross-origin resource sharing.
After adding all the packages, your package.json should look like this 👇
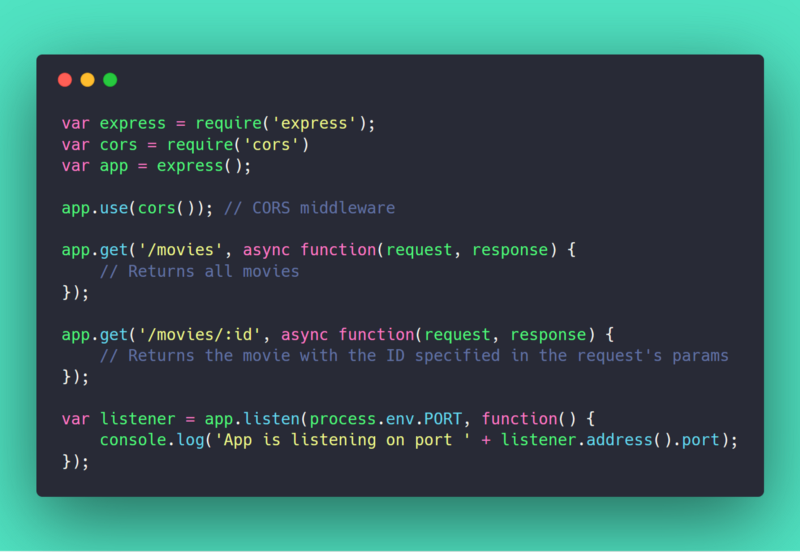
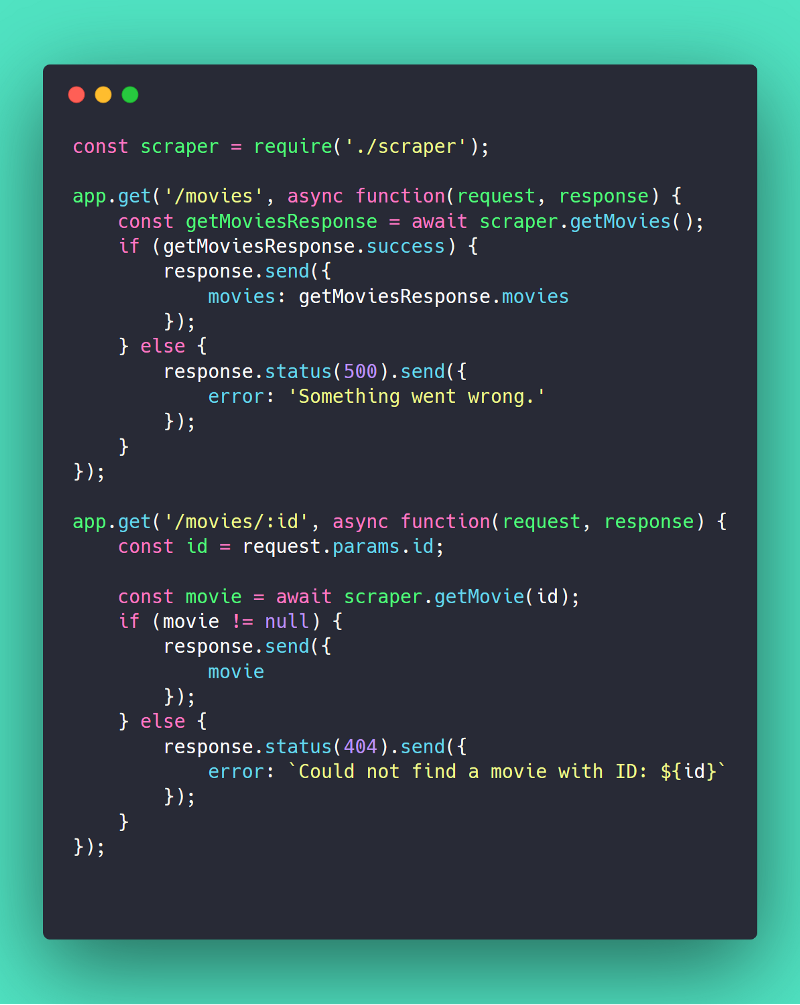
Setting up our Express.js routes
We only need two (2) routes. GET /movies & GET /movies/:id.
Website scraping with Cheerio
I don’t like to litter my server.js file so for anything that isn’t related to setting up the server, middle-ware, and routes I like to create a separate file for it.
Create a scraper.js file using the “New file” button. It’s where we’re going to put the code that scrapes the Silverbird website.
Our most important function is scrapeMovies(). It downloads the HTML from "https://silverbirdcinemas.com/cinema/accra/", parses it with Cheerio and creates a list of movies with the relevant bits of the parsed HTML.
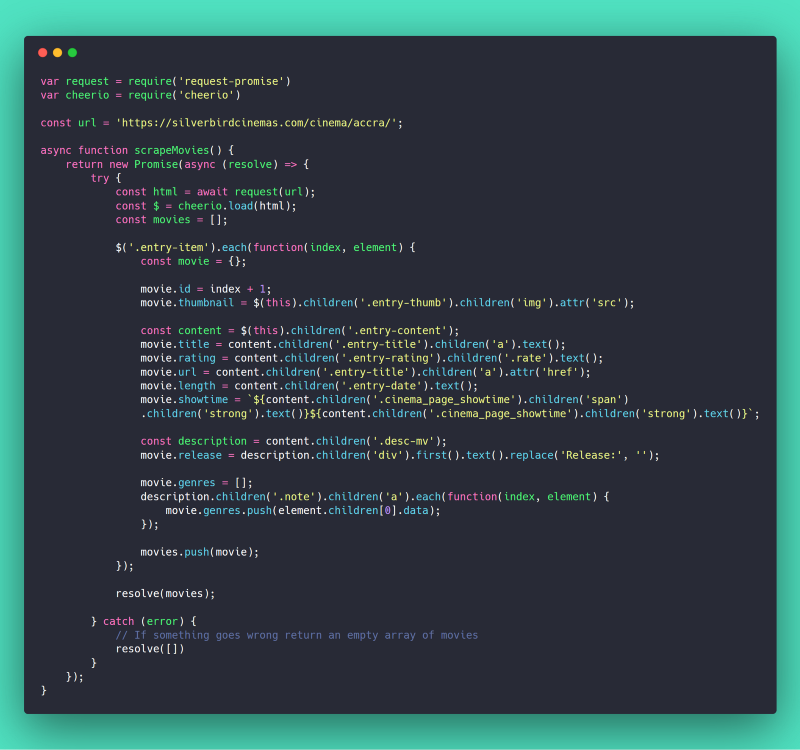
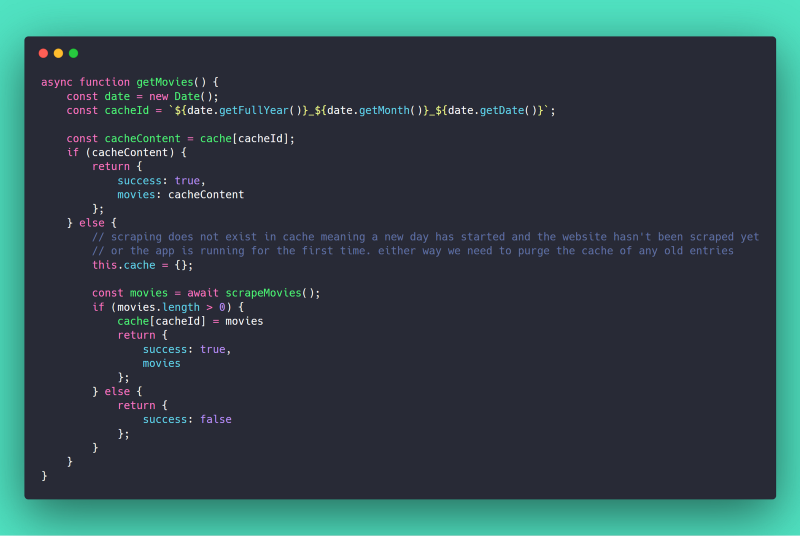
Downloading, parsing, and generating a list of movies on every request isn’t a trivial task. Since Silverbird Cinemas rarely change the listings on their website more than once a day, we can cache the scraping in other to speed up the response time of requests. The getMovies() function does exactly that.
When a user requests /movies/:id we need to provide more details about a movie. Details like a header image, director, cast, and synopsis. These details aren’t available on the Silverbird Accra landing page. Instead, they’re available on a separate detail page which we store in each movie’s url property during scrapeMovies(). The getMovieDetails() function will download the detail page, parse and generate a details object which we’ll then store in each movie.
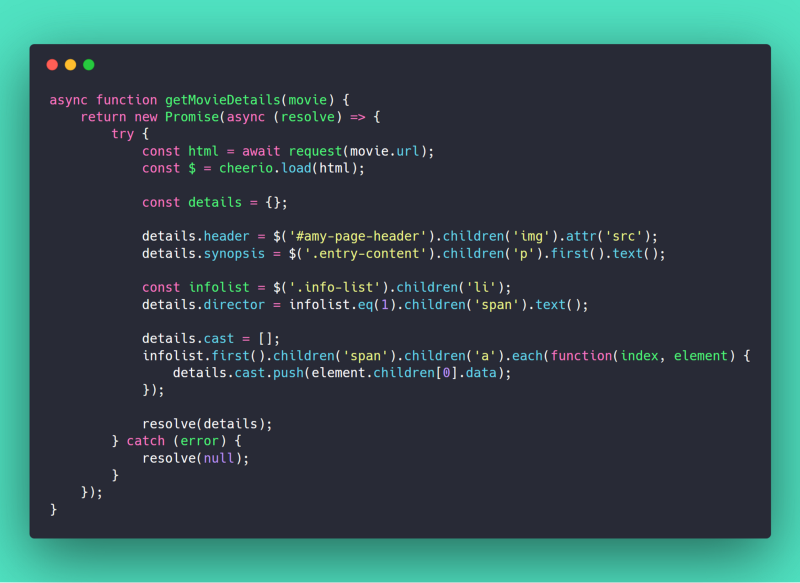
Scraping the detail page for each movie for each request is time consuming so if the details for a movie does not exist, we’ll scrape and return the details. Otherwise, we return the already scraped details. The getMovie() function does that for us.
<img
Now that we’re done with scraper.js we need to export our functions so we can use it in server.js. Exporting is as simple as 👇
module.exports = {
  getMovies,
  getMovie,
};
Finalizing the API
We now need to connect the scraper to our routes so that when someone calls /movies or /movies/:id in server.js, we’ll return the results of getMovies or getMovie in scraper.js respectively.
To use the functions we exported in scraper.js we need to import them. Importing is as simple as 👇
const scraper = require("./scraper");
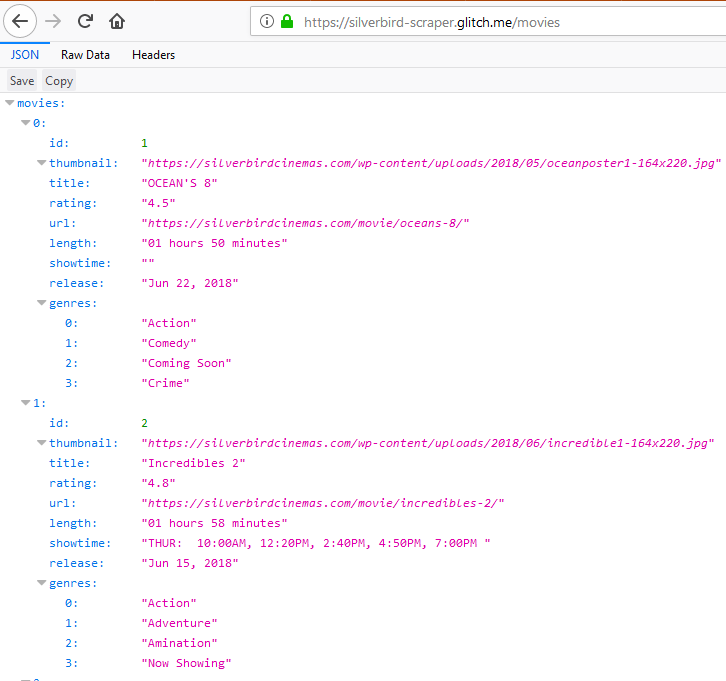
To test if our API works, open a new tab in your browser of choice — mine is Firefox Quantum. Navigate to <your_project_name>.glitch.me/movies
So that’s it for this tutorial. We learnt how to create a Node.js based website scraper from scratch. In the next tutorial we will be working on the accompanying front-end application with Vue.js.
Thank you for reading and don’t forget to check the next part soon!
You can browse the source code of this application on Github.